Storage Setup
Configure local, Amazon S3, or Cloudflare R2 storage for Mentor LMS course files and media.
Mentor LMS supports multiple storage options for course files, videos, and other media content.
Accessing Storage Settings
- Log in to your admin dashboard
- Navigate to Settings → Storage Settings
Available Storage Options
Local Storage
Stores all files on your web server. Suitable for smaller installations or when starting out.
Pros: No additional configuration, no extra costs, simple management
Cons: Limited by server disk space, may affect server performance with many files
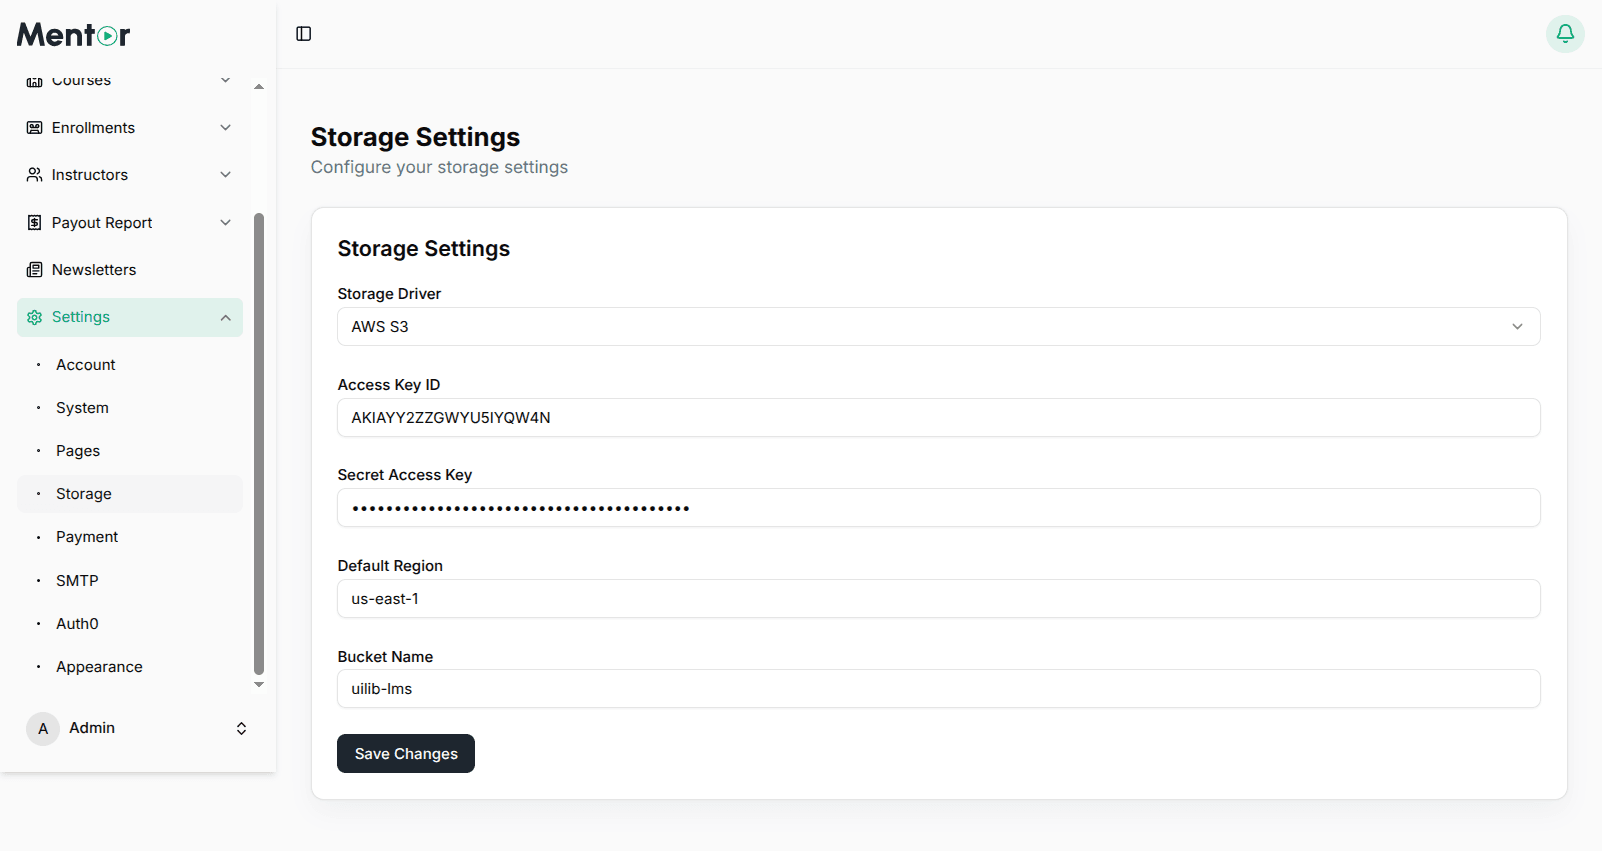
Amazon S3 Storage
Store files on Amazon's scalable cloud storage. Recommended for production environments.
Pros: Virtually unlimited capacity, better performance, CDN integration, high reliability
Cons: Requires AWS account, costs based on usage
Cloudflare R2 Storage
S3-compatible object storage with zero egress fees.
Pros: No egress/bandwidth charges, competitive pricing, global distribution
Cons: Requires Cloudflare account, storage costs apply
Configuring Local Storage
- In Storage Settings, select Local Storage
- Click Save Changes
Configuring Amazon S3
- Select Amazon S3 as your storage driver
- Enter the following credentials:
- AWS Access Key ID
- AWS Secret Access Key
- AWS Default Region (e.g.,
us-east-1) - AWS Bucket — Bucket name
- AWS URL —
https://your-bucket-name.s3.amazonaws.com
- Click Save Changes
Getting S3 Credentials
- Log in to AWS Management Console
- Navigate to S3 → Create bucket
- Under Permissions, uncheck "Block all public access"
- Enable CORS:
[
  {
    "AllowedHeaders": ["*"],
    "AllowedMethods": ["GET", "PUT", "POST", "DELETE"],
    "AllowedOrigins": ["https://your-domain.com"],
    "ExposeHeaders": []
  }
]- Create an IAM user with S3 access and generate access keys
Configuring Cloudflare R2
- Select Cloudflare R2 as your storage driver
- Enter the following credentials:
- Account ID or Access Key
- Secret Access Key
- Endpoint — Your R2 bucket endpoint URL
- Public URL — Public URL for accessing files
- Bucket Name
- Region — Typically
auto
- Click Save Changes
Getting R2 Credentials
- Log in to Cloudflare Dashboard
- Navigate to R2 → Create bucket
- Go to Manage R2 API Tokens → Create API Token
- Set Read & Write permissions
- Copy the Access Key ID and Secret Access Key
- Your endpoint:
https://[account-id].r2.cloudflarestorage.com - Enable public access for your bucket to get the Public URL